Time to Reboot!

Isn’t that what teachers do every year?  REBOOT.

New school.  New job.  New blog title.  I’d say that qualifies as a major reboot.

This year I’ll be embarking on a new journey… (gotta love those original introductions!)

*REBOOT:

This year I’m going to crush some new goals. : )

  1. Smoothly transition from EdTech teacher to EdTech coach.
  2. Support students and staff with the use of technology in their classrooms.
  3. Create a personalized model of professional development for teachers.
  4. Provide increased community access through social media.
  5. Stay balanced.

Lofty?  Maybe.

Attainable?  YES.

Which of these goals do you think will challenge me the most?  I’d love to hear your suggestions in the comments!

Also, please share how you’re planning to REBOOT!


Thanks for reading!

: ) Brandi

Our iPad Use – On Video!

It has been WAY too long since I’ve posted, so I am planning a few ideas over the next few days…

The first one, which my class had been working on for a little while, is available for viewing below – our first video!  (Don’t get too excited, it’s only 90 seconds!)  We’ve been talking more and more about creating our own videos, and this is the first one that we’ve organized and put together.  (Permission to post this online has been granted by their parents, so no worries!)


Since we’ve made this video, the students have shot several videos of themselves giving brief presentations on projects that they have completed.  (This is in place of those whole-group presentations that take SO long to get through.)  Many of them have gotten more comfortable on camera and they enjoy watching themselves and re-shooting, which just allows for more practice with those fun speaking and listening standards.  : )

We are hoping to start using iMovie in the near future, which will allow for easy editing and even more creativity!   I would like to put together a self-assessment rubric for the students to use as they watch their video presentations.  Here is a rubric from Kathy Schrock that looks like a great starting point – Video Production Rubric – Kathy Schrock.  (Isn’t she just the best?  Thanks, Kathy!)

Thanks for watching and have a great weekend!

: ) Brandi

Happy Computer Science Education Week!

Aahhh, I know it’s been so long since I’ve posted, but I’m excited to say that our iPads are finally going to be updated, which means things will be able to move along a little more smoothly!  By next week, we will be reorganizing and testing out some new things with our updated versions… Unfortunately, this will be right in time for our winter break. I’m sure I will be ready to get back into the swing of things in January and hopefully keep working on our Quarter 2 goals. : )

Until then, there’s this story going around about the Hour of Code and I cannot WAIT to get the kids started on it!  If you haven’t heard about it, check it out at csedweek.org.  (On Twitter, check out #csedweek and #hourofcode!)

There are videos, recommended apps, and even a program for students to work through that walks them through the basics of coding.  It starts off with basic movements and gets more complicated after each level.  You can easily sign up and students can log in and create their own username.  Seems like an easy way to get the kids excited about computer technology! (or rather, MORE excited!) : )

I will definitely be updating to share how our Hour of Code goes this week, and I’d love to hear other stories as well! Which apps do you think the students will enjoy the most?  Hopefully we will be able to try several of them out… (Kodable, Hopscotch, LightBot, etc?)

Thanks for stopping by and have a great Computer Science Education Week!

: ) Brandi

Quarter 1 Reflection: Looking Back and Moving Forward

Well, the first nine weeks are complete!  How did they fly by so fast?  Seems like a good time for some reflecting… : )

Looking back at my initial goals and planning stages, it’s interesting to see how things are actually moving along at this point in time.  As I’m writing this, I have a ton of different browser tabs open, as usual!  One of them is my “Planning the Adventure: Part 1″ post, which is where I had compiled my list of goals for the program.  Here’s how these goals have actually played out:


Goal #1:  Model effective daily use of digital curriculum materials.

Oops.  Silly wi-fi.  It kind of threw a wrench in this plan.  However, we have recently gotten a little help and this will be something that will be attempted again for the second quarter.  Working with the online curriculum resources will allow the students to leave their textbooks at home.  Yay for lighter backpacks and less complaining!


Goal #2:  Utilize digital assessments and immediate feedback to focus and drive instruction.

SMART Extreme Collaboration – yes, very cool!  Other digital assessments – yes, but not as cool.  SMART VE – not yet.  If you are a classroom teacher, you know that the students are assessed A LOT.  Some weeks, a greater amount of time is spent on assessments than on actual instruction.  So, it has been extremely helpful that all of our digital assessment tools (so far) are compatible with the iPads.  Being able to access these assessments right from their seats has definitely eliminated a lot of transition time.  (Which leaves more time for me to analyze all of the wonderful data that is being collected!) ; )


Goal #3:  Increase opportunities to read and respond to complex texts not readily available in print form.

Check!  Easy goal to reach using iBooks for literature and online articles.  We read The Wonderful Wizard of Oz, and since every student had their own copy, it worked really well for my mini-lessons on the reading standards for literature.  (If you’ve never read it and are thinking to yourself, really?  The Wizard of Oz?  Isn’t that an easy kid’s book?  : )  Try it.  Good stuff.)  QR codes have worked wonders for this goal as well.  (I love using www.qrstuff.com but I know there are others out there that are just as easy.)  They can quickly access any text I find online and we can use it altogether, in small groups, or independently.  (What are other ways you use QR codes? Let me know!)


Goal #4:  Teach research strategies to preview and explore content, and evaluate digital resources in order to select the appropriate tools to accomplish a variety of tasks.

This one is definitely a work in progress.  We have used Britannica in science to expand on our curriculum content, but we haven’t completed an actual research assignment yet.  Second quarter goal…

**Side note:  Expanding on curriculum does NOT necessarily increase the students’ assessment scores.  I want to give them time to find answers to questions they have about the curriculum, however those are usually not the things they are tested on.  Building knowledge is really important, but there is a lot of focus on numbers these days.  It’s hard to balance, even when trying to see the big picture…


Goal #5:  Provide opportunities to create original products which communicate a content-related concept or process.

Another second quarter goal.  Throughout the first quarter, we tested out a few things and learned about several apps that we can use to create original products.  (Some were good (Educreations), others were just ok (Whiteboard).)  This is something that I’d like to somehow work into my regular schedule, perhaps used as review projects.  I have ideas for vocabulary, math processes, and science concepts.  Eventually, we will be using Pages to create documents using text and images.  Now, to just find the time.  : )


Goal #6:  Encourage peer collaboration using online forums and interactive applications.

It’s interesting to see how the iPads have encouraged peer collaboration without any online forums.  They have been very willing to show each other things they find, which I’m hoping will continue as we expand our resource base.  I’m still not totally sold on Gaggle, but am not giving up on it yet.  Second quarter goal: Introduce discussion boards on Gaggle.  (Let me know about your experiences with student discussion boards – guidelines, requirements, etc.)


Goal #7:  Promote effective keyboarding skills.

Check!  TypingWeb has been a great resource for the kids and they use it as part of their morning routine.  For the first 10-15 minutes of the day, they log on and work on their current typing lesson.  After six weeks, they seem really comfortable with the smaller keyboard, and some of them are doing pretty well with keeping their hands positioned correctly.  (Which is something I am TERRIBLE at.)  Many of them are between 20 and 30 words per minute, which seems pretty good for 10-11 year-olds!  I’m definitely going to continue to use this as part of their daily routine, especially since we are going to be creating documents soon.  I think a few of them are going to be able to type better than I can!


All of these goals have things I need to think about as I move forward, but I also realize that there are other things I want to accomplish.  One major point I have missed this far is the goal to get the students connected.  Connected to other students, connected to the outside world, etc.  It’s definitely something I need to figure out, maybe for the third quarter?  Also, balancing all of our resources and really focusing on the ones that are most beneficial is something I need to work on.  There is just not enough time in the day, the week, or the month to use all of these tools effectively.  Choose and focus.  My new motto.  : )

Thanks for stopping by to check in.  I’d love to hear your feedback, so don’t be shy!   Quarter 2 is the next adventure and I can’t wait to see where it leads!

: ) Brandi


Reinventing Literacy Centers with iPads

Literacy Centers.  They make some people cringe.  I have never done them the same way twice.  I guess that’s because I have never found a way to implement them that I really thought got the most out of my students.  Enter iPads!  Of course, I’ve already realized how powerful these devices are in the hands of my students, but the growth we made this week made it even more clear.

Since this was going to be our first week, I started out with activities similar to ones that the students had already completed, so that they could practice the basic procedures and rotation.  Last week we wrote down the objectives of each center they would visit, and although I had different expectations for several of the groups (low vs. high achievers), they would still be completing similar tasks.  We reviewed the record sheet that they would complete, which you can find here (Small Group Record Sheet), and discussed the correct way to fill it out each day.  (I knew that we would be using a two week rotation to complete the tasks, hence the back to back sheet.  Also, I was channeling my Project Child days by including the Daily Reflection.)

I started off the way most people do, by grouping the students according to their ability level.  They will be rotating through six centers throughout the week, and will have about 20 minutes at each one.  Here’s what I’m starting with for October:  (I know myself enough to realize that I will be adjusting it each month.)


Vocabulary Building Centers:

1.  SMARTBOARD  (collaborative) – Making Big Words Activity

Students are challenged to create as many large words as possible from specific letters that create a large word altogether (this week was “deportation”).  They rotate through three jobs: “Creator”, “Definer”, and “Recorder” after every three words.  In the last several minutes, they need to work together to write a sentence using the largest word created.

*iPad – used for defining words, and will be used to create word list and submit electronically  (Next week I am going to introduce Padlet, which will be a way for the groups to collaborate on the same list throughout the week.)

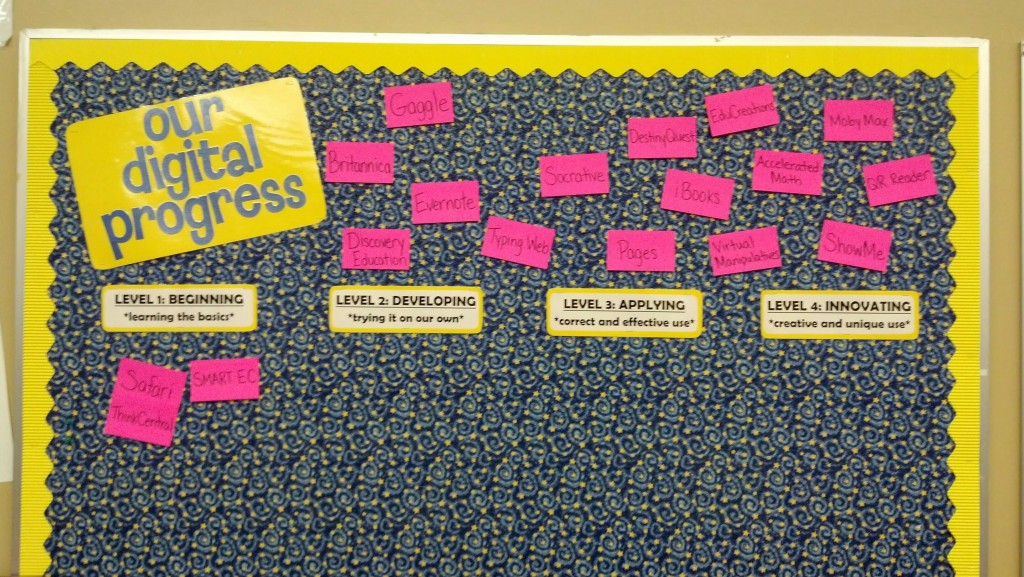
2.  GAGGLE (independent/differentiated) – Weekly Vocabulary Activity

This week’s activity was to write a story using our weekly vocabulary words.  Since our transition to common core, creative writing is not something that there is a lot of time for, so this is an easy way to work it in.  By using Gaggle, I can create a slightly different assignment for each group.  For example, the students were required to use as many forms as possible of our root word “port” and our multiple-meaning word “scale”.  My higher groups also had to work in as many of our academic vocabulary words as possible.  At the end of the week, the students enjoyed sharing and editing their stories together.

*iPad – used to access Gaggle, create a document, and submit it to appropriate assignment dropbox


Reading Comprehension Centers:

3.  LITERATURE (collaborative discussions in class/independent reading outside of class) – Literature Circle Activities

I am a firm believer in the use of literature circles to enhance reading instruction.  This will be a slightly scaled down version of how I normally use them, but the discussion element will still be effective.  The students selected a book to read together and worked out a tentative reading schedule.  Over the next few weeks, they will meet during this time to discuss the sticky notes they are using as they read.  They will also have the option to use some of our collaborative tools such as Popplet to contribute their ideas to one group product.

*iPad – used to find books appropriate for their group, define vocabulary words, extend on topics from the story, and create collaborative products

4.  RESEARCH (collaborative/differentiated) – Current Events Article Activity

Since the students would be using fiction books in the Literature Center, I knew I needed to include a center where they would be reading informational text.  I printed out QR codes for the students to access the article, read the article together, and then identify the main idea and supporting details.  The second phase of this center (which the higher achieving groups will be able to complete more often than the other groups) is to use their My Britannica account to learn more about a topic related to the article they read.  They can choose one topic as a group, or they may choose different topics.  Either way, their job is to record related details and use those to elaborate on the text from the article.  This type of written response is going to take some time for them to master, but weekly practice will help them to compare multiple texts and incorporate details from both.

*iPad – used to access informational article through the QR reader, and to log into My Britannica to find more related information (will also be used to organize information, maybe using one or more of our collaborative apps)


Skill Practice Centers:

5.   TEACHER (differentiated) – Reading Response Activity

Obviously here is where most of my differentiation will occur.  The kids all need practice analyzing and responding to complex text, but this way I can give them a passage that is best suited for their current instructional level.  I just found this cool site that allows you to adjust the lexile level of the same article: http://www.newsela.com/pages/about-newsela/.  ReadWorks is also a resource that has a lot of passages that are leveled as well.  (And of course I have the leveled readers that are included in our curriculum series, but to be honest, they are just too long for this amount of time.)  We have also been using iBooks, which is helpful because they all have access to the same text if I want to refer to it in the whole group setting.

*iPad – used to access leveled passages and to organize information, can be used to type response and share electronically

6.  MOBYMAX (independent/differentiated) – Reading and Vocabulary Activities

This is a free web-based program that teachers can sign up for that provides individualized lessons for students based on placement tests.  It automatically assigns lessons to the students and can be used for Reading, Writing, and Math.  Here’s the link if you want to find out more: http://www.mobymax.com/.

*iPad – used at the students’ seats for independent practice


There are a lot of resources out there if you’re looking to start literacy centers in your classroom and want to make sure they are aligned to the common core standards.  On the other hand, there is not much out there if you are looking for ways to integrate iPads into the same activities.  This is definitely a work in progress and I know the kids are going to have ideas about how we can use some of our new tools at these centers in different ways.  Some other things I’d like to work in:

*Vocabulary – access analogy apps and websites, use Quizlet to review vocabulary

*Fluency – use iPrompt to practice fluency with partners, Reader’s Theater

*Writing/creating book trailers


Here are a few other resources that are out there:

*Florida Center for Reading Research: http://www.fcrr.org/curriculum/SCA_CCSS_index.shtm – There are printable activities that are aligned to the standards for all grade levels.

*Learning Centers in the Middle Grades: http://www.blevinsenterprises.com/Learning_Stations_Handout.pdf – This document includes tons of ideas for centers!

*Appitic Google Hangout featuring Richard Colosi: http://go.appitic.com/index.php/webcasts/richard-colosi-integrating-ipad-literacy-circles – This video focuses on the integration of iPads into literacy centers of a primary grade classroom. (@RichardColosi)

*Teachers Pay Teachers: http://www.teacherspayteachers.com/ – Tons of resources related to common core aligned literacy centers!


This week we will definitely be polishing up our center work and maybe branching out a bit to try some of our collaborative apps too.  Let me know if you’ve had any experience with technology and literacy centers, I’d love to hear what else is happening out there!

Thanks for stopping by and have a great week!

: ) Brandi

Screencasting: Using EduCreations (Attempt #1)


logo_educreations

This week I introduced EduCreations to the kids and we were all really excited to give it a try.  Screencasting is something I knew I needed to incorporate into my lessons (mainly as assessments), if I wanted to make sure I was getting meaningful use out of our iPads.  Screencasts are basically just audio recordings of what the presenter is doing on their screen.  You’ve probably seen tutorials of some kind that use a screencasting tool.  With EduCreations, audio is recorded over a blank screen that you can type/write/draw on, which makes for a really creative assessment tool.  (The kids thought it was pretty cool that this was going to be a way that they could be tested in place of “boring” paper/pencil tests.) : )

Our first full attempt was going to involve group science investigations.  Even as it was happening, I realized that I should have started smaller, but it turned out ok… : )  We began the same way we do with all of our new tools:


Step 1:  Complete the first two sections of our new tool graphic organizer: Purpose of Tool and Acceptable Use Reminders. 

I gave them a few minutes to explore and work with their neighbors to discover some of the various options they had.  (As we are learning about more and more of our digital tools, they are becoming much more comfortable with figuring things out on their own!  Some of them are really quick to find the similarities between the different tools we use.)  Then we agreed on the guidelines to record on our graphic organizers.


Step 2:  Create a mini-recording with a partner that included information from our discussion. (How were we going to be able to use EduCreations in our classroom?) 

I always try to keep in mind that they need this “discovery” time to play with the options before we actually use the tool in an academic way.  (Changing the background from a blank whiteboard to lined or grid paper is a really nice feature.  And of course if they can change the size and color of something, they WILL.)  Working with a partner (or 2) allows the ones that don’t catch on to things as quickly to be guided through by the others.  If they would have all worked independently at this point, it would have taken quite a bit longer.  (Plus, we like to travel on the collaboration train these days…) : )


Step 2b:  Figure out how to save the recording without creating an account.

It’s amazing how many steps something as easy as saving a short recording needs to have.  We walked through it together, and all thought it was a bit unnecessary.  Their comments are just too funny sometimes.  “Those seven steps we just went through could have been easier as two steps, right?”  Yup, exactly what I was thinking.  Gold star for you, kid. : )


Step 3:  Complete activity that will be used for the screencast.

Here is where I was a bit too optimistic.  Not quite over the top, but almost. : )  Team science investigations.  Each a little different because I wanted them to come up with their own questions.  This only works if you are flexible and willing to give up some of your “teacher control”.  Still working on that.  Ah well, lesson learned… And we proceed. 

At this point, the kids were coming up with “scripts” as they completed their investigations, since they knew they would be responsible for recording information about each step they took.  Positive: Being held accountable for coherant explanations.  Negative: Practicing their explanations takes a bit more time than they have available.

They also were going to be including photographs of their investigation (which we had not yet done), but at this point, 5th graders are well-versed with using cameras on various devices.  Plus, we had already discussed the appropriate use of photos in class, so most of them did a nice job of focusing the cameras on their materials and data as opposed to the people in their group.  (*Please note:  At this point, you need eyes in the back of your head.  And on the right and left.  Watching…  Always watching… Ah, Roz.) : )


Step 4:  Create screencast as a team.

They used their photos (and some imported photos from the internet, another nice feature), to create a screencast as a team.  I could tell that using only one iPad per team was a bit frustrating for some of them, but they all managed to create something by the end of the class time, which included most of the requirements:  text, visuals, and audio recording for each step.   It was interesting at this point to see the different choices that each team made.  Some created different pages for each step of their investigation, and some used one page that they simply scrolled down to present their information.  Every student had the chance to record at least a small part of their creation, so I was relieved that they were sharing the responsibilities.  During this step, I didn’t want to interrupt their recordings, so I was doing a lot of pointing at the clock, pointing at my wrist, hurry-it-up motions, etc. to keep them on track.  Must have looked a bit foolish.)


Step 5:  Share screencasts!

Checking out the others’ work was really beneficial, especially since it was the first time they had tried it.  They could compare what they had done with others and see what things are possible.  EduCreations has a lot of examples that others have shared as well, which means the students have a lot of models to get ideas from.  I need to make sure to always allow time for them to share what they’ve created.  (At some point,  they may be able to post a link on our class Gaggle page for the others to access, but that will be after I figure out the possibility of having them create an account…)  SECURITY! 


Lessons Learned:

*The students are making a really strong connection between screencasting and powerpoint presentations.  Show them more examples and discuss the differences, so that they can start using it as more of a modeling tool instead of simply providing information.

*Start with assignments that have fewer parts.  For example, a quick screencast of how to use the long division method may have been a better idea…

*Do not put them in a box.  Flexible guidelines and requirements will allow for the most creative screencasts.  I’m excited to see what they come up with as they get more comfortable creating their recordings!


For assessments, I’m planning to use some of the resources I found on Kathy Schrock’s website: Screencasting in the Classroom.  (Love her!)  Check it out if you’re interested in learning more about screencasting… 

We are going to be working with a few other similar tools this week, so I’m excited to compare those to what they created last week.  ScreenChomp is another one that I’d like to try.  What are some others that you’ve used?

Have a great week and thanks for stopping by!

: ) Brandi

iPad Workflow – The Good, the Bad, and the Ugh!

So we’ve been working with our iPads for a few weeks now, and I’ve introduced the kids to Gaggle.net for our classroom digital workflow, which is our county’s adopted student email system.  (And before you make other suggestions, Google Docs, Dropbox, and other ways to store files online are not options for me.)  In addition to email, the students can save files in a digital locker, upload those files to our class’s assignment dropbox, post articles and other resources to the class page, and contribute to the discussion boards.  It really is a wonderful resource for teachers to use for communication and collaboration between the students.  I thought that this was the answer to all of my workflow questions!  Ah, yes.  In a perfect world… ; )

Have you ever had an idea in your head about how something should work, only to find out that it’s not the reality?  Of course.  You can see where I’m going with this.  I feel like there’s always something that would make it work so much better!  It seemed like it was going to work perfectly, especially since I could even annotate on their submitted work!  Unfortunately, that’s not exactly how it went down.  (You didn’t see that coming, did you??)


The Good:

Phase 1 – (email to teacher only)  On the first several days, the students were able to successfully log into their accounts, access their email, and respond back to emails I had sent to them.  Yes!  “This is so cool!” they said.  “We love email!”  (*Note to self at this point:  Continue working on typing skills.  DAILY.)

Phase 2 – (add digital locker)  The next step was going to be creating files to save to their digital dropbox, which can be accessed through any device.  The internal document creator is pretty limited, but still includes the basics, so it’s fine.  However, we were using the Gaggle app on our iPads, not a desktop, so we discovered even more limitations.  Still ok, because we can still create a “Word” document to save.  The kids thought this was pretty cool too, and some even assured me that they were going to try it out at home!  (A few actually did!  And again, seriously keep trucking away with that typing practice!)


The Bad:

Phase 3 – (add assignment dropbox)  Here’s where things start to get a bit fuzzy.  I can create assignments with due dates, instructions, and attachments, and the students receive an email that there is a new assignment for them.  It even shows up in their calendar!  However, when they click on the assignment in their calendar, it brings up a window with editing capabilities.  Hmm.  They need to click back to Home in order to access all of the assignments in order to find the most recent one.  Ok, completely doable.  But now, some of them cannot see it.  Is it a device issue?  Wi-fi?  Who knows, because it was available to some of them, but not others.  Plan B:  Project the assignment so that they can all see it.  Finally they can get started.  Always moving forward! 


The Good: 

Phase 4 – (add submitting assignments)  Once side-stepping the assignment roadblock, actually submitting assignments worked out really well.  Once they create their file for the assignment, they have an option to submit it from the same page.  “This is so easy!” they said.  “We love submitting assignments!”  Yay!  (Granted, this is only the beginning…  How long will I be able to stretch out the “coolness factor”?) 


The Ugh:

Phase 5 – (add returning assignments)  Gaggle has a cool feature that allows me to type on their created files that they’ve submitted, highlight things, add notes, etc.   I can type in their grade at the top along with other notes about their response.  I was really excited about this!  I was envisioning them getting their assignments back and being able to make corrections to resubmit if necessary.  Hm, nope.  Not so much.  When I return their work, they receive an email that I’ve returned it, but in order to them to see it, they need to click on a web link.  It opens as a web link.  To me, this does not make sense.  They can only see what I’ve marked, but not actually change anything.  Now I know that I could have them copy and paste, blah blah blah… : )  But really, I feel like this part could have been a bit more logical.  Is there even a place for them to save their completed and graded work?  Do they have to go back into their email list to find them?  This part I am going to be exploring more, but my first impression wasn’t too positive.  (Hence, the “Ugh”.)


Ideally (and maybe it will just take more time with it), this is a great tool for the kids to use, especially to help them get used to going back and forth between different components.  And it is still a way for them to turn in work and for me to return work to them.  However, it just didn’t work the way I had envisioned in my head…  This is one of the first (major) frustrations I’ve had so far (which I guess is a good thing!)… I don’t see the same frustration in the kids yet though, so that’s also a good thing.

Work in progress, right?  We’ll keep moving forward, as always… : )  Next up, creation apps!  (You know, EduCreations, Whiteboard, things like that.  What were you thinking??)   Thanks for stopping by!

: ) Brandi


Learning the Basics: Initial Lessons

Now, it may be difficult for some people to hear this, but school is not just about academics.  (GASP!)  Our first few weeks of school have been filled with all kinds of life-long lessons that the students will be using.  They even come in nifty categories to make it easier for me to post for you! ; )


DIGITAL CITIZENSHIP :

Digital Citizenship Components

No matter what grade you teach, if you are going to be integrating technology into your classroom in any way, these lessons are a must.  There are many different ways to go about it, and there a lot of resources online, but it just happened to be a concidence that what I found to use was the same thing that my county was choosing for us to use as well: Common Sense Media.  (This is also a great resource to let parents know about, since it reviews books and movies to help them choose appropriate media for their children.)  They have grade level specific lessons, posters, and videos for classroom use, so you do not have to create anything on your own.  However, I did merge the ideas that I found on their website with the document I mentioned last week, which you can find here.  I knew that I wanted to introduce the students to specific topics, so each lesson was focused on only one of the elements.  It included the definition of the element, focus questions that were discussed with their small groups and then the whole class, and scenarios that allowed them to decide if the element was appropriately understood.  These are the lessons I used throughout the first two weeks:

      • Digital Access
      • Digital Etiquette  (BrainPop has a FREE video with resources on this one!  Score!  Here it is!)
      • Digital Literacy
      • Digital Communication
      • Digital Rights & Responsibilities
      • Digital Safety (Security)

Each student had a sheet that they kept in their binder (within the “iPad” section) to record their thoughts about each element at the end of each lesson.  Finally, to make sure they understood the elements that we discussed, I had them write to explain to me what each element meant to them as part of their learning process.

I feel like the time I spent on this aspect was well spent and extremely necessary, since I was planning to use the iPads on a daily basis.  Even if students are just learning to explore more digital resources online, these are lessons that they should be exposed to as they become a part of the digital society.  (Plus, they think it is super cool that they are becoming a part of a “society”, so as usual, it’s all in the delivery!)


IPAD 101 :

I had given the kids (and parents) a technology survey before school even started, so I had information about what kind of technology the students had already been exposed to at home.  As expected, there was a HUGE range of experiences, from using a device like an iPad independently, to not having internet access at all, even on their family’s cell phone.  One of the parent concerns at our meeting was regarding the students who had no experience interacting with a tablet before.  It was going to be important to start from the beginning, no matter what the students’ experiences were.  I created SMART Board slides (within my weekly lesson files), as well as “cheat sheets” for the kids’  binders on the following topics:

      •  Buttons and Screens  (Sleep/Wake button functions, Home button functions, swiping to screens, swiping to Spotlight search, creating app folders, etc.)
      • Charging  (When, How, How Long, and Battery-Saving tips)
      • Bluetooth Keyboard  (Set-up, Bluetooth connection, Charging)
      • Multitouch Gestures (Four-finger swipe, three-finger zoom, etc.)  They really get a kick out of this stuff and think I am the coolest for showing them how to use these shortcuts.  Cool points for me. : )

The tasks that I assigned were built around these lessons and it was interesting to learn that they were going home and sharing what we had talked about in class with their families.  (Especially the tips about charging the iPad, since it could be applied to other devices as well.)  One student mentioned that she informed her father that he had been “overcharging” his phone and if he wanted to save its battery life, he should really listen to the tips I had given to her.  Oh dear… : )  (But, way to go!)

DIGITAL TOOL LESSONS :

Each new tool I introduce to the students will be an important resource for them, so they have a graphic organizer to complete, which ensures that they understand how we are going to be using it in the classroom.  (Observe optimistic thinking here. ; ))  The organizer includes a space for them to record the purpose(s) of the tool, acceptable use reminders, effective educational uses, and their own opinions.  (We complete the first two parts before using the tool, and will complete the second two after using it for a few weeks.)  It also includes information on how they log into the resource if necessary.  (We have gotten used to writing down the log in convention instead of their own personal log in information, to make sure that we are keeping our information safe!  Some of them are extremely concerned about this!  Yay, digital security!)  So far, the tools that we have learned about are:

      • Safari browser – Using tabs, creating bookmark links, searching, using the “reader” option, zooming capabilities
      • TypingWeb (online) – Logging in, navigating the lessons, periodically accessing the typing test
      • Renaissance Learning apps – STAR Reading Enterprise test, AR quizzes and records for tracking their progress
      • Gaggle (secure email – online and app) – Email access, creating documents in Digital Locker, locating and submitting assignments, and organizing personal calendar events (Definitely multiple lessons!)
      • iBooks app – Accessing the available ebooks, using the highlighting tool, annotating using the notepad
      • Dictionary app – Searching, marking favorite words (for vocabulary reference)

If you remember from a previous post, I had created a bulletin board that tracks the progress of our digital tool use… It’s been really helpful for me because it keeps me on track and moving forward.  Each week, I know that our progress needs to be updated, PLUS I get to pick out a new resource for us to learn about.  I’m trying hard not to move too fast, even though a few of the kids would definitely be ready for more.  I don’t want to overwhelm them, and I of course need to make sure I’m getting to the curriculum.  (Remember that stuff?  Yup, we’ve been fitting that in, too!)


TROUBLESHOOTING :

Not everything has worked exactly as planned.  (Hopefully none of you are shocked by this.)   This is both good and bad.  Bad because I want everything to work the way it’s supposed to every time (here’s that optimistic thinking again), but good because it allows us to address issues we are having as a class.  For example, our wi-fi isn’t exactly the greatest.  : )  It will sporadically kick the kids off, and so we have had to have mini-lessons on what they need to do in those situations.  Many of them have caught on very quickly that this is a regular occurance, and do not feel the need to inform me every time it happens.  (Notice that I did not say “all of them have caught on”?)  Checking the wi-fi under their settings and restarting the iPad are both part of their “troubleshooting” strategy.  As things come up, we have a quick lesson on what can be done, and they’ve gotten much better at solving these problems on their own.  (Thank goodness.)


Since it has only been three weeks, there are still many lessons to work into our schedule, but this is how we started out!  Now that we have some knowledge under our belt, we will be working more with digital assignments in (and possibly out) of the classroom.  Workflow in a 1:1 classroom is important to plan for, so next time I’ll let you know how ours is working out!  Thanks for visiting and have a great week!

: ) Brandi

Meeting the iPads

So this year was definitely the first year in a while that I was legitimately stoked for the first week of school.  (“Excited” wasn’t quite getting the job done there, so I had to bump it up a notch…)  Scared out of my mind of course, but super stoked.  The kids and parents had already been prepped, thanks to our pre-first-day-of-school parent meetings.  Being able to have face-to-face conversations with the parents about the program was by far the best way to start the year off on the right foot.  It allowed them to see how much time and effort we were investing into their children’s education and how much we believed it was going to positively affect their learning environment.  They asked relevant questions and were looking forward to their children being able to have this opportunity.  It was important that they were made aware (in person) that this was going to be a much greater responsibility than their child had ever been given before, and that there were going to be consequences for violating our policies.  There was no resistance at all regarding the Student/Parent Agreements that needed to be signed, so we were good to go!

I was undecided about which day I should actually put the iPads into the kids’ hands.  I knew that it definitely wasn’t going to be Day 1, and they were disappointed (surprise!), but understood.  There are just so many things to go over on the first day!  Standard classroom procedures, you know the drill… Really engaging stuff.  I had already planned to use a SMART Notebook file to organize my weekly schedule, and it helped to keep me on track (and not sprint ahead!). 

On the second day (the BIG DAY), we started off with a class meeting and discussed several points: the perceptions that others will have about this program and appropriate ways to respond to questions they might have, how their choices outside of the classroom will be an indication of how responsible they are capable of being inside the classroom, and things they were either looking forward to or worried about as we started up our new adventure.  It was really amazing to have our Assistant Principal join our meeting (crossed legs on the floor and everything!) because they were able to hear his perspective on our thoughts as well.  This was definitely the most important part of our day, and I was relieved that they were all willing to participate and share their thoughts with the rest of their classmates.  After going through the document of guidelines and policies point by point, it was time to introduce our digital citizenship elements.  This document (which is excerpted from Chapter 2 of Digital Citizenship in Schools, Second Edition by Mike Ribble) was the guide I used to set up the lessons I created for each element.  It includes the definition of each element along with an explanation, and also provides appropriate and inappropriate uses.  Such a great resource! 

Then (FINALLY), it was time to meet the iPads!

iPad 101 – Lesson 1:  Buttons and Screens

Basic “I do, We do, You do” strategy here.  I went through the information on the SMART Board (taken from the iPad User Guide), showed them each part and corresponding function on my iPad, then had them explain to me what each part did before sending them back to their seats.  By this time, they were basically exploding from the anticipation of it all!  They knew that they were expected to leave the iPad flat on the table in front of them for today, and they definitely did not want to lose their first chance to use it.  The directions that I wanted them to follow were displayed on the board, and so as I handed out each device, they could work at their own pace to figure everything out.  (Turning on the iPad, checking out the apps/links on the Home screen, swiping to the second screen to find “folders” of apps, and accessing the school’s website from the link located in the Dock.)  Their reactions (especially from the ones that had never used a device like this before) were priceless.  I could also tell right away that there were several students that were extremely familiar with this type of technology!

At this point, I realized that we were probably going to be able to move a bit faster (and I wanted them ALL to be able to go home and tell their parents that they learned something brand new), so I decided to show them how to add a link to their Home screen that we were planning to use almost every day, TypingWeb.com.  (TypingWeb is a free web resource that tracks student progress through a variety of typing lessons.)  It was only the first day using the iPads, and the students had all successfully created a bookmark link, renamed it, and moved it to their Home screens.  I was excited, they were excited… It was a good day. : )

I know that it will not be this easy every day.  Since that second day, we have run into a few “bumps” as expected, and I plan to chat about those very soon!  They don’t discourage me, and I’m training the kids not to be discouraged either!  It’s all a part of our process and each step gets a little better.  Here is a post on Edudemic written by Tom Daccord and Justin Reich of EdTechTeacher that I’ve recently read, “Failure is Mandatory: Creating a Culture of Innovation”…  It helps on those days when things are going wrong. 

Coming up, I’ll be posting more about our digital citizenship lessons, and of course more iPad 101 lessons!  Setting up the bluetooth keyboards was an experience… : )

: ) Brandi

Planning the Adventure – Part 2: SETUP!

Hey there!  Welcome back!  I’m just going to keep rambling about how our little program came to be… : )

Spoiler alert.  The first part of the planning which I’ve already described didn’t ACTUALLY happen first.  It just happened first for ME.  There was A LOT of planning that had to happen “behind-the-scenes” that didn’t include me at all.  The early decisions made by my Assistant Principal and Tech Specialist helped to ensure the success of many aspects of this program.  Without their foresight, a lot of things would have been much more difficult, and I can’t even tell you how grateful I am to them for being so supportive throughout this whole process.

CLASSROOM SETUP:

1.  Charging Plan – There’s a lot of different ways to handle using technology in classrooms, and if you’re using 1:1 devices, you have to plan for a way to charge them.  Here’s what we’re doing:

Charging Tables

Notice the handy-dandy outlets that pop up in the middle of the table?  There is also a place for two USB connectors… Oooh! : )  Other options include charging carts or cabinets, but once the batteries start losing their charge faster, it will be extremely annoying to have students only able to charge their device in the cart.  (Or for that matter, at an outlet in the corner of the room.)  A huge thank you goes to the Tech Specialist for researching (and planning and measuring, etc.) in order to find the PERFECT tables for the classroom!

2.  iPad Storage and Organization – Well… This part has been a never-ending process.  Literally.  I’m still trying to find what kind of storage will work the best.  Ideally, I’d like a storage bin for each table that includes a place for each of their iPads, their chargers, and the other accessories such as styluses (styli?) and screen wipes.  I’ve seen so many different options, even some that use dish racks!  So creative!  As for cases or sleeves, we are still working on that as well.  The iPads use a Logitech keyboard cover (which was also due to research done by the Tech Specialist!), and they are super sleek!  However, when the students aren’t using the keyboard, the iPads will need to be in a protective case.  Most definitely.

3.  Classroom Walls/Boards – I knew that I wanted to have focus walls for our Digital Citizenship components, but I wanted to leave room for the students to add their work as well… Here’s a few things that I’m starting with:

Digital Citizenship Components      Digital Footprint     Student FootprintsDigital Progress Board

If you’re familiar with the word “Marzano” : ) then you will recogize the progress board… So far, the kids seem to understand the progression, so as we move the tool cards, I’m hoping they’ll be looking for ways to use them in creative ways.  I mean, INNOVATING ways. : )


PAPERWORK:

Who doesn’t love paperwork? : )  Here are several things I’ve drafted:

    • iPad Program Guidelines
    • Student/Parent Agreement
    • Policy Violations Notices (1st Offense, 2nd Offense, 3rd Offense, Major Offense)
    • Student Action Plan (required with 2nd Offense, 3rd Offense, and Major Offense)
    • Program Goals

We discussed with the parents that since this is a pilot program, everything is considered a work-in-progress.  Hopefully there won’t be too many items that need to be changed, but we may be required to add details here and there as different situations arise. 


IPAD SETUP:

1.  Apple IDs – This was another thing that the Tech Specialist took on and thank goodness he did, because it made setting up the iPads so much easier.  Several Apple IDs were set up for our school so that any purchases or downloads could be approved by various ID users.  The Apple ID that I use to directly load apps onto the iPads is the lowest level of the heirarchy and all of the iPads are logged into this same account.  (I may not be describing this well at all, I just know that it was a really important part of being able to quickly load the same apps on all of the iPads.)

2.  Loading Apps – Because each iPad is on the same account, every app that I downloaded on one would automatically show up to be downloaded on the others.  I cannot even tell you how excited I was when I realized that it worked the same way for any eBooks I downloaded!  Woohoo!!!  Syncing them all took a little time, but since I had already planned out which apps and links I wanted to start with, it wasn’t too bad.  (I started timing myself, and was super proud when I was finished setting up one of the iPads in less than 5 minutes!)

3.  Identification – The iPads all have a number labeled on the outside of the keyboard cover .  The iPad itself needed its own label as well, and I found these number photos online here!  (Thank you Jennifer Magiera!)  I just downloaded them and could easily set both the Lock and Home Screens. iPad Screen


I know there are probably other things that I should have mentioned here, so if there’s something that is blantantly missing, let me know and I’ll add it asap.  Hope this gives you a little glimpse into how we started our program!  

Stop by next time for a report on our first weeks of school!  (The first week was awesome and the kids were really excited to get started, so we were able to do a few more things than I originally planned.  Guess I need to keep OVER-planning, just in case!)

: ) Brandi